Getting your drawing onto your watercolor paper
There are many ways artists get their drawing onto their watercolor paper. Don’t worry if you don’t have amazing drawing chops. There are a lot of ways of getting your drawing done and none of them are “cheating.” Artist have always used whatever means and technology have been available to them to create art.
How detailed a drawing needs to be depends on how detailed you want your painting to be. You don’t have to start a painting with a drawing at all. You can begin with a clean sheet of watercolor paper and just paint. This method is called direct watercolor painting. It’s great for a loose watercolor painting. When I want to paint a painting with some general shapes and details, I do a loose drawing. And when I want to create a detailed painting, I start with a detailed drawing.
Ways to transfer your drawing to your watercolor paper
Don’t jump in drawing, erasing and figuring out your drawing on your watercolor paper on the fly. Good watercolor paper should be treated well. Watercolor paper is treated to accept water and paint but it is not an ideal drawing surface. If you press your pencil too hard, you will carve into your paper. As a result, when you start painting, the watercolor will pool in those indents and show up darker than in other areas of your paper. If you use a hard eraser, it could scuff up the surface of the paper. That too will likely show up when you start painting. So always keep your pencil lines light and use a kneaded eraser. The light pencil lines won’t create dents or grooves on the paper’s surface and the kneaded eraser won’t scuff up the finish on the paper.
Here are some methods for getting a drawing onto your watercolor paper.
Drawing Directly on the Watercolor Paper
If you are a good drawer then you can draw directly onto your watercolor paper. Do take care not to damage the paper with too much erasing and redrawing. For this reason many artists who aren’t comfortable drawing freehand prefer other methods. Even very competent drawers will use a different way to get their drawing onto the watercolor paper if the painting they want to create is hyper realistic, very detailed, or quite time consuming to draw freehand.
The Grid Method
The grid method has been used for centuries and even the Old Masters relied on it for accuracy and perspective. Draw the grid on both the reference image and your watercolor paper. Once your grids are in place, create your drawing by re-creating the line work you see in each square of your reference image onto each corresponding square on your watercolor paper. Square by square you can copy the entire drawing fairly accurately. You can also scale up or down between your reference image and your watercolor paper by scaling your grids proportionately. When you are done drawing, you will need to erase the grid lines on your watercolor sheet before painting. There are even apps that create the grid on your photo for you. That saves time as you don’t have to create the grid on your photo reference but you will still have to recreate the grid proportionally on your watercolor paper. This is my least preferred way of drawing. You spend a lot of time drawing and erasing grid lines. It’s mind numbing and can be a bit hard on the paper.
Tracing
Another option is to trace your reference image onto your watercolor paper. This requires that your reference image be the same size as your painting will be. You can tape your reference image on a well lit window, tape your watercolor paper on top of it, and trace. Or you can tape your reference image to a light table, tape your watercolor paper on top of it and trace. If instead of a window you are using a light table, you will be able to see more of the image if you darken the room you are in.
Tracing works if you are using 140 lb paper but 300 lb paper is just too thick to see through, even on a light table.
Graphite Paper
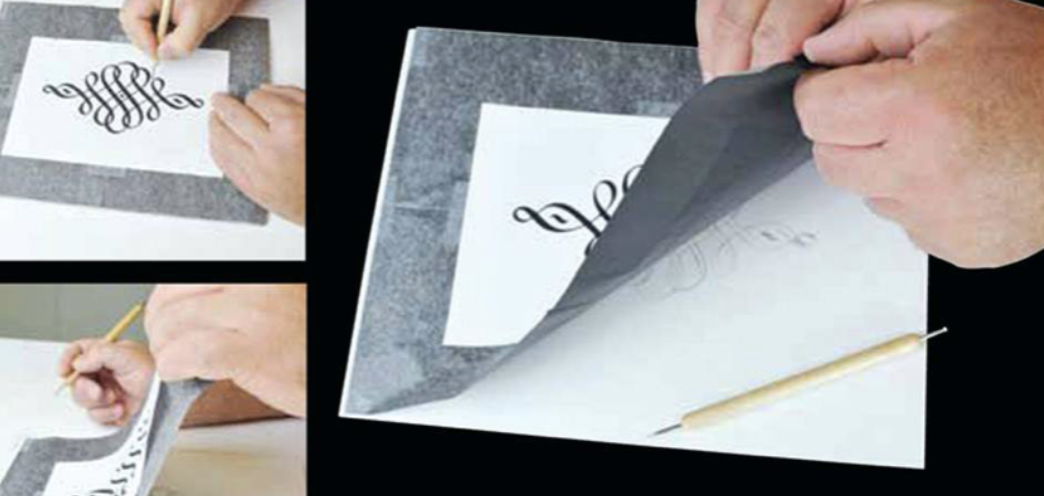
Graphite paper is coated on one side with a smooth layer of graphite. It comes in sheets ronin a roll and you tear off the size of sheet you need. A sheet of graphite paper can be used quite a few times before it runs out of graphite and needs to be replaced.
Place your watercolor paper on your table. Place the graphite paper coated side down on the watercolor paper. Tape your drawing right-side-up on top of the graphite paper. .Use a hard lead pencil (H or HB, for example) to trace the drawing. You will draw right on your reference photo. The pressure from your pencil will transfer the graphite on the graphite paper onto the watercolor paper. When you’re finished tracing, simply remove the reference image and graphite paper.
There are a few drawbacks: I find that wherever I rest my hand as I draw tends to leave a smudge of graphite on the watercolor paper and as my hand works across the drawing, that can create for a lot of smudging. The other drawback is that the graphite from this paper does not erase easily so if my drawing is darker than I had hoped for, I’m kind of stuck with it. However, this Loew-Cornell transfer paper is not as problematic and if you choose to use graphite paper (transfer paper) I recommend this brand. It comes in white and in gray. The white is for drawing onto colored paper so you will want to get the gray to draw onto watercolor paper. Each graphite sheet can be used many times.
Tracing Paper
This is an approach best suited for less detailed drawings. Use a piece of tracing paper to trace your reference image. Once you are done tracing, flip the tracing paper over and use a graphite pencil to completely cover the back of the line drawing. Then turn the tracing paper the right way up and place it onto your watercolor paper. Trace over the lines once again so that the pressure from this second tracing transfers the graphite on the back of the tracing paper to your watercolor sheet.
Use a Projector
When I need an accurate drawing for a detailed painting, I use a projector. It saves time and allows me to create a clean drawing. I plug the projector into my laptop, where I keep my photos, and it projects onto the wall. By adjusting the projector, the image can be scaled to different sizes, allowing me to control the size and composition of my drawing.
Using a projector seems to be controversial for some artists. They feel that using a projector is “cheating,” and by using it an artist is no longer drawing. I disagree. I have given students the same photo to draw using a projector and no two drawings turned out the same. No one copies the projected information in the same way. What might initially seem like an easy way to draw, can actually complicate your process because it is easy to get lost in all of the information and draw too much. Drawings can end up looking like squiggly jigsaw puzzles of confusing pencil lines.
Without some drawing skills, using a projector can be overwhelming. Drawing up close and in the dark is another challenge artists must master with this system. Like anything else, it takes practice. However, using a projector helps train your eye and makes your freehand drawing better over time.
Don’t turn away from using a projector for composition, accuracy and scale. For detailed paintings, the projector can be a great tool.
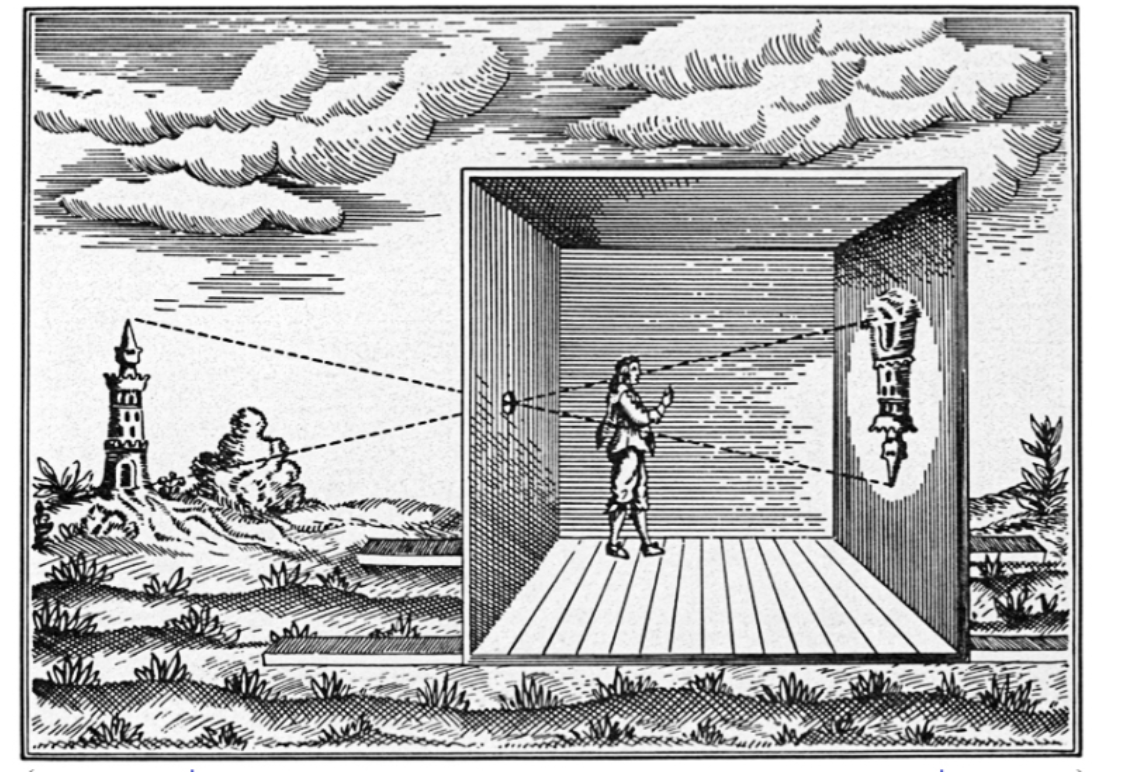
Research has shown that the Old Masters used forms of projection as well. A wonderful book by David Hockney, titled Secret Knowledge: Rediscovering the Lost Techniques of the Old Masters, explains how they did it. It confirms the use of optical tools to gain perspective and realism and debunks the myth that everything was done freehand. ,
You have to decide as an artist whether a method or tool is right for you. If you can’t get over the feeling that it’s cheating, don’t use it. Artists reflect their personality and personal feelings through their art, so be honest with your methods, and do what feels right for you. But also, don’t come up with arbitrary “rules” as a way of throwing stones on your own path.


